


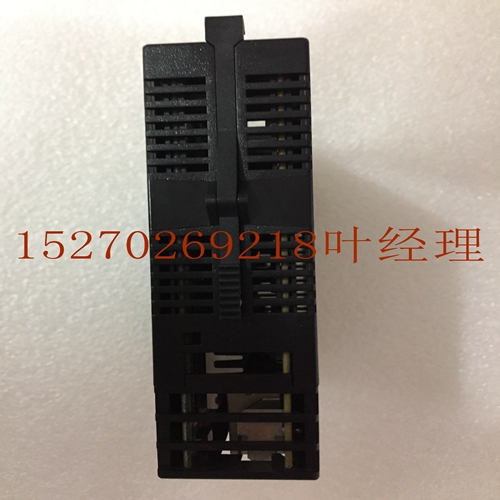
IS200VTURH2B IS200VTURH2B模块控制器,处理器模块
Sysm High vel s F Alog s August Controlr数据表F用户接线图下图显示了底座转换器和扩展器板上螺钉的接线分配。此外,本数据表接线图中的信息显示在每个铰链门内标签的内表面。沿着转换器电流扩展器电压扩展器跳线接地的E ICALG E输入是辅助接地。MON是ALOG MON。+并显示参考的差分输入的极性。引脚通过形成ALOG扩展总线。++仅输入基本转换器。为电流输入连接INRL OHM负载:为电压图平均关闭。现场接线连接板基本转换器和扩展器F Alog输入系统高级控制器8月数据表F纠正现场接线程序在将现场接线连接到Alog输入基本转换器或扩展器上的检测板时,应遵循以下程序。以下程序中引用的所有IC的特征如下图所示。铰链式门板起重螺钉起重螺钉绳索系带CAT绳索系带CAT束带绳索系带CAT系带绳索系带系带绳索系带绳索系带CAT图。特征。卸下或安装电路板之前,请关闭电源。用螺旋千斤顶打开通道上的铰链门,将电路板牢牢固定到位。通过顺时针转动螺旋千斤顶,直到其完全脱离,即可将检测现场接线板从中移除。取出板,抓住板的p并向外摆动。小心不要使用铰链门拆除电路板。如果这样做的话,铰链门可能会被戳破。电路板的设计可接受AWG#的尺寸。mm至AWG#。重要的是,当使用AWG#.mm布线时,绝缘直径为。不得超过in.mm。只有在两个尺寸相同的情况下,才能在任何一个上安装两个正确的连接。该板设计为可接受AWG#.mm s。如果使用AWG#.mmm s,则标志应放置在距离安装端至少mm处,为铰链门关闭提供足够的空间。Alog Input Sysm High level s F Alog s August Controlr数据表F起重螺钉a BUND CAB TIE CAT DO PULL ON DOOR图。董事会主席。对于机架中的所有连接,必须固定堤岸。确保堤岸正确固定。应记住,应在堤岸周围缠绕一个驾驶室系带,并通过位于板右下角的驾驶室系带cat locad将其牢牢固定。对于特大型堤岸,应使用额外的系缆带。车门标签插页包含在每个指示器接线信息中,并提供空间记录用户接线标识。铰链门上有一个插槽,可插入该标签。如果标签难以插入,请在插入前将刻痕边缘弄皱。外部标签有一个彩色编码条纹,可快速识别电压类型蓝色:低电压;红色:高压。现场布线完成后,应通过将板带插入机架上底部卡导向格栅的sll矩形槽中,将板牢固地固定在机架上。该条带不仅将板固定在机架上,还提供了一种识别d板及其正确的机架插槽位置的方法。为了充分通风,请记住,机架格栅的上方和下方至少允许有一个单位为毫米的克拉。堤岸不应妨碍烧烤架的工作。从机架中的插槽中卸下时,应遵循以下说明。用拇指在板盖前部,手指在板盖背面的塑料夹上,牢牢抓住板盖的顶部和底部。用手指挤压机箱盖背面的机架卡夹,使卡夹脱离机架导轨,然后用力拉动电路板,将其从背板上卸下。沿卡导轨滑动电路板,然后将其从机架中取出。
Sysm High vel s F Alog s August Controlr Data Sheet F User Wiring Connections The following illustration shows the wiring assignments for the screw s on the board of the Base Converr and Expander s. In addition the infortion in this data sheet wiring diagrams are prind on the inside surface of the label inserd in ea ’s hinged door. ALOG ALOG a E ICALG E INPUT ALOG CONVERR CURRENT EXPANDER VOLTAGE EXPANDER JUMPER GROUND IS ASSIS GROUND. MON IS ALOG MON. + AND SHOW POLARITY FOR DIFFERENTIAL INPUTS REFERENCED . PINS THROUGH FORM THE ALOG EXPANSION BUS. + + INPUTS BASE CONVERR ONLY. CONNECTS AN INRL OHM LOAD FOR CURRENT INPUTS: AVE OFF FOR VOLTAGE Figure . Field Wiring Connections Boards Base Converr and Expander s F Alog Input Sysm High vel s Alog s August Controlr Data Sheet F Remended Field Wiring Procedures The following procedures are remended when connecting field wiring the detaab board on an Alog Input Base Converr or Expander . features referenced in the following procedures whi are mon all IC s are illustrad in the following figure. a HINGED DOOR BOARD JACKSCREW JACKSCREW CORD TIE CAT STRAP CORD TIE CAT STRAP CORD TIE CORD TIE STRAP CAT Figure . Features . Turn off power before removing or installing boards. Open the hinged door on the access a jackscrew whi holds the board securely in place. The detaab field wiring board can w be removed from the by turning the jackscrew counrclockwise until it is fully disengaged. . remove the board grasp the p of the board and swing it outward. Caution Do t use the hinged door remove the board. The hinged door could be daged if this is done. . The board is designed accept sizes from AWG # . mm through AWG # . mm. It is important that when using AWG # .mm for wiring all points that a insulation diamer of . in .mm t be exceeded. ensure proper connection two s y be rmid on any one only if both s are the same size. . The board is designed accept a of AWG # .mm s. If AWG # .mm s are be used then rkers should be placed at ast ines mm from rmition end provide sufficient space for the hinged door close. Alog Input Sysm High vel s F Alog s August Controlr Data Sheet F JACKSCREW a BUND CAB TIE CAT DO T PULL ON DOOR Figure . Remol of Board . Afr pting connections all s in a rack the bund must be secured. ensure that the bund is secured properly it is remended that a cab tie be wrapped around the bund and tightly secured through the cab tie cat locad at the lower right corner of the board. For extremely large bunds additiol cab ties should be used. . A door label insert is included with ea indica wiring infortion and provide space record user wiring identification. A slot is provided on the hinged door allow for insertion of this label. If the label is difficult insert crease the scored edge before insertion. The outside label has a color coded stripe allow quick identification of the voltage type blue: low voltage; red: high voltage. . Afr field wiring is pd the board should be securely fasned the rack by inserting the board strap attaed ea in the sll rectangular slots in the botm card guide grill on the rack. This strap t only secures the board the rack it also provides a way of identifying the d board with its correct ting rack slot location. . For adequa ventilation it is remended that at ast a in mm carance be allowed above and below the rack grill. bunds should t obstruct the rack grill work. Removing an The instructions below should be followed when removing an from its slot in a rack. Grasp the board firmly at the p and botm of the board cover with your thumbs on the front of the cover and your fingers on the plastic clips on the back of the cover. Squeeze the rack clips on the back of the cover with your fingers disengage the clip from the rack rail and pull the board firmly remove it from the backplane . Slide the board along the card guide and remove it from the rack.
")
")
")
")

