


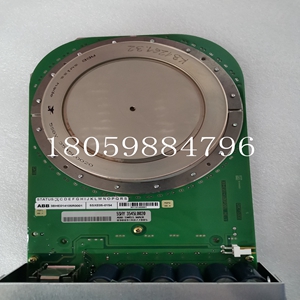
5SHY3545L0020工业机器人
现场接线端子5至32用于现场设备
它们采用单根导线,最大AWG#14(横截面平均2.1mm2)。最小推荐尺寸为AWG#20(横截面平均54mm2)。接地(GND)端子(5)用于闭塞安全。它连接到块底盘,并连接到标记为GND的端子13、16、20、24、28和32。如果需要,每个通道都有一个接地端子用于屏蔽端接。块电源接线对于块电源,将适当的电源连接到端子6和7。对于交流块电源,电源连接到H端子,中性线连接到N端子。对于直流块电源,将电源连接到直流+端子,将回路连接到直流-端子。自供电或外部供电变送器的接线方式与模块供电的变送器不同。BSM PWR+H或DC+N或DCGND COM NC+BSM-BSM OUT RTN GND OUT RTD GND EXC I N COM GND EXD I N COM接地EXC I I N GND 5 6 7 8 9 10 11 13 14 16 17 19 21 22 23 24 25 26 27 28 29 30 31 32 4线电路功率0-850欧姆负载变送器2线电路变送器OUT COM 3线电路+变送器4线电路DC+DCDC电源变送器DCDC++外部电阻器对于接地输出负载,如果模块的两个输出负载都接地,并且负载之间的距离很大,则应在每个负载到模块的回路中安装一个外部电阻器。这将防止两个接地点之间可能出现的显著电压差对块体造成可能的损坏。建议使用10欧姆电阻器。拆卸电子组件块的电子组件可更换为兼容型号,无需拆卸现场接线或重新配置块。
端子组件固定螺钉
(数量2)电子组件连接器引脚1.拧下块顶部和底部的固定螺钉。2.使用块拉拔器(IC660BLM507),将凸耳接合在第一个通风槽中。将工具移动到块的中心并挤压手柄。3.向上拉动电子组件。警告:如果现场端子通电,端子组件底部的连接器引脚也会暴露电源,存在触电危险。请勿接触接头针脚!可能导致死亡或受伤。插入电子组件1.将电子组件对准导轨并用力向下推。注意不要用力过猛;它可能会损坏块。2.如果遇到异常电阻,拆下电子组件。如果模块通电,请勿触摸连接器插脚!检查端子组件、连接器插座和连接器边缘板(在电子组件上)。确保键匹配。清除所有障碍物并重新插入电子组件。密切注意导销的对准。3.用端子组件顶部和底部的螺钉固定电子组件。LED块的单元OK(正常)和I/O Enabled(I/O启用)LED显示其运行状态。单元OK I/O Enabled意味着ON ON块功能,CPU通信ON OFF块功能3总线扫描无CPU通信ON闪烁块功能,电路强制闪烁ON电路故障,CPU通信闪烁OFF电路故障3总线扫描没有CPU通信交替闪烁电路故障,电路强制同步闪烁无CPU通信-块号冲突OFF闪烁电子设备/端子组件不匹配OFF无块电源或块故障
Field terminal blocks 5 to 32 are used for field devices
They use a single conductor, with the maximum AWG # 14 (average cross section 2.1mm2). The minimum recommended size is AWG # 20 (average cross section 54mm2). The GND terminal (5) is used for blocking safety. It is connected to the block chassis and to terminals 13, 16, 20, 24, 28 and 32 marked GND. If required, each channel has a grounding terminal for shield termination. Block Power Wiring For a block power supply, connect the appropriate power supply to terminals 6 and 7. For AC block power supply, the power supply is connected to the H terminal and the neutral wire is connected to the N terminal. For DC block power, connect the power supply to the DC+terminal and the loop to the DC - terminal. Self powered or externally powered transmitters are wired differently from module powered transmitters. BSM PWR+H or DC+N or DCGND COM NC+BSM-BSM OUT RTN GND OUT RTD GND EXC I N COM GND EXD I N COM grounding EXC I I N GND 5 6 7 8 9 10 11 13 14 16 17 21 22 23 24 25 27 28 29 30 31 32 4-wire circuit power 0-850 ohm load transmitter 2-wire circuit transmitter OUT COM 3-wire circuit+transmitter 4-wire circuit DC+DCDC power transmitter DCDC++external resistor For grounded output load, if both output loads of the module are grounded, If the distance between loads is large, an external resistor shall be installed in the circuit from each load to the module. This will prevent possible damage to the block caused by the possible significant voltage difference between the two ground points. A 10 ohm resistor is recommended. The electronic components removed from the electronic module block can be replaced with compatible models without removing the field wiring or reconfiguring the block.
Terminal assembly fixing screw
(Qty. 2) Electronic assembly connector pin 1. Unscrew the fixing screws at the top and bottom of the block. 2. Use the block puller (IC660BLM507) to engage the lug in the first ventilation slot. Move the tool to the center of the block and squeeze the handle. 3. Pull the electronic assembly upwards. Warning: If the field terminal is powered on, the connector pin at the bottom of the terminal assembly will also expose the power supply, which may cause electric shock. Do not touch the connector pins! May cause death or injury. Insert the electronic assembly 1. Align the electronic assembly with the guide rail and push down firmly. Be careful not to exert too much force; It may damage the block. 2. If abnormal resistance is encountered, remove the electronic components. If the module is powered, do not touch the connector pins! Check the terminal assembly, connector socket and connector edge plate (on the electronic assembly). Make sure the keys match. Remove all obstacles and reinsert the electronic components. Pay close attention to the alignment of the guide pins. 3. Fix the electronic components with the screws at the top and bottom of the terminal assembly. The unit OK and I/O Enabled LEDs of the LED pack indicate their operational status. Unit OK I/O Enabled means ON ON block function, CPU communication ON OFF block function 3 Bus scanning without CPU communication ON flashing block function, circuit forced flashing ON circuit fault, CPU communication flashing OFF circuit fault 3 Bus scanning without CPU communication alternating flashing circuit fault, circuit forced synchronous flashing without CPU communication - block number conflict OFF flashing Electronic equipment/terminal components do not match OFF No block power or block fault
")
")
")

