


330180-50-00本特利前置器
顶部护罩拆卸
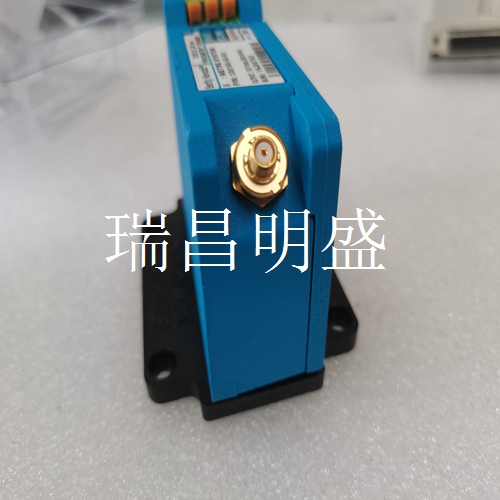
从3301机架上拆下RIM。从RIM上拆下顶部护罩。从RIM PWA上卸下原始固件IC。将升级固件IC安装到RIM PWA上的插槽中。更换RIM顶部护罩。将RIM更换到3301系统中。使用3301机架配置软件重新配置RIM。以下页面提供了上面列出的一些步骤的详细说明。请在继续操作前进行全面检查。顶部护罩拆卸1)顶部护罩。2) 对峙。3) 螺丝刀。步骤1.将大平头螺丝刀放在顶部护罩下方和后支架的脊上,并向上提起螺丝刀,将盖子从后支架上松开。步骤2.上下移动顶部护罩,使其从两个前支架上松开。3301/40操作和维护5维护35原始固件IC拆卸步骤1.将小平头螺丝刀插入IC两端的唇部下方。该图显示了要移除的芯片的大致位置,但不一定是其方向。步骤2.用螺丝刀轻轻撬起芯片的一端。移动到芯片的另一端并重复。继续此过程,直到芯片从插座上松开。5维护3301/40操作和维护36升级固件IC安装将升级固件IC装入PWA。确保IC的缺口端与插座的缺口端匹配。确保IC牢固地安装在插座中。顶部护罩的更换更换顶部护罩。确保顶部护罩上的槽口位于模块的左上角,如“顶部护罩拆卸”下的图所示。
将顶部护罩上的孔与支架对齐
并在每个支架周围向下按压,直到它们卡入到位。5.3实时时钟更换小心正确处理实时时钟组件。不要焚烧!机架接口模块上的实时时钟组件使用内部锂电池,需要每3至10年更换一次。更换间隔取决于环境条件,如工作温度。3301/40操作和维护5维护37放电的锂电池可能会在机架断电时导致操作信息丢失。实时时钟组件采用插孔设计,便于更换。有关必须更换实时时钟时显示的消息,请参阅第6节中的系统事件列表消息。请联系最近的本特利内华达公司办公室进行更换。为了替换实时时钟,遵循第5.2节(执行固件升级)中的说明,但以下情况除外:时钟组件在Pwa上的大致位置如下所示:组件和插座排列如下:6故障排除3301/20操作和维护38 6故障排除本节描述了如何排除机架接口模块或I/O的故障通过使用验证屏幕、LED、系统事件列表和报警事件列表提供的信息。您可以使用机架配置软件显示验证屏幕和两个事件列表。6.1验证执行机架接口模块的验证:1.将运行机架配置软件的计算机连接到3301机架(如果需要)。2.从机架配置软件的主屏幕选择实用程序。3.从实用程序菜单中选择验证。4.选择机架接口模块并选择要验证的通道。5.按下验证按钮。6.选择前端口或后端口以获取状态。7.模块OK(正常)状态将显示机架接口模块的状态,通道OK(正常状态)将显示通道的状态。
Top shield removal
Remove the RIM from the 3301 rack. Remove the top shield from the RIM. Remove the original firmware IC from the RIM PWA. Install the upgrade firmware IC into the slot on the RIM PWA. Replace the RIM top shield. Replace the RIM into the 3301 system. Use the 3301 Rack Configuration Software to reconfigure the RIM. The following pages provide detailed instructions for some of the steps listed above. Please check thoroughly before continuing. Top shield removal 1) Top shield. 2) Confrontation. 3) Screwdriver. Step 1. Place a large flat head screwdriver under the top shield and on the ridge of the rear support, and lift the screwdriver upwards to release the cover from the rear support. Step 2. Move the top shield up and down to release it from the two front supports. 3301/40 Operation and Maintenance 5 Maintenance 35 Original Firmware IC Removal Step 1. Insert a small flat screwdriver under the lip on both ends of the IC. The figure shows the approximate location of the chip to be removed, but not necessarily its direction. Step 2. Gently pry up one end of the chip with a screwdriver. Move to the other end of the chip and repeat. Continue this process until the chip is released from the socket. 5 Maintenance 3301/40 Operation and Maintenance 36 Upgrade Firmware IC Installation Install the upgrade firmware IC into the PWA. Make sure that the notched end of the IC matches the notched end of the socket. Ensure that the IC is securely installed in the socket. Top Shield Replacement Top Shield. Make sure that the notch on the top shield is located in the upper left corner of the module, as shown in the figure under "Top shield removal".
Align the holes in the top shield with the brackets
Press down around each bracket until they click into place. 5.3 Replace the real-time clock. Carefully and correctly handle the real-time clock components. Don't burn! The real-time clock component on the Rack Interface Module uses an internal lithium battery and needs to be replaced every 3 to 10 years. The replacement interval depends on environmental conditions, such as operating temperature. 3301/40 Operation and Maintenance 5 Maintenance 37 A discharged lithium battery may cause loss of operational information when the rack is powered down. The real-time clock component adopts the jack design for easy replacement. For messages that appear when the real-time clock must be replaced, see System Event List Messages in Section 6. Please contact the nearest Bentley Nevada office for replacement. To replace the real-time clock, follow the instructions in Section 5.2 (Performing Firmware Upgrades), except for the following: The approximate location of the clock components on the Pwa is as follows: Components and sockets are arranged as follows: 6 Troubleshooting 3301/20 Operation and Maintenance 38 6 Troubleshooting This section describes how to troubleshoot a rack interface module or I/O fault by using the verification screen, LEDs, system event list, and alarm event list. You can use the Rack Configuration Software to display the verification screen and two event lists. 6.1 Verification Perform the verification of the Rack Interface Module: 1. Connect the computer running the Rack Configuration Software to the 3301 rack (if required). 2. Select Utilities from the main screen of the Rack Configuration Software. 3. Select Verify from the Utilities menu. 4. Select the Rack Interface Module and select the channel to verify. 5. Press the Verify button. 6. Select the front port or the rear port to get the status. 7. Module OK Status will display the status of the Rack Interface Module and Channel OK will display the status of the channel.
")
")
")

