


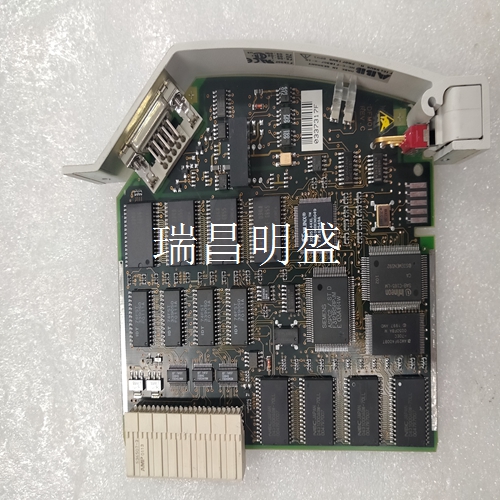
2664109-DO DSSX129 工控模块卡件PLC/DCS备件模块
通过按特定顺序切割带
不切割带来配置测深仪。使用标准分流切割工具切割探尺带。始终完全切断皮带(例如,间隙应至少为0.5mm)。将配置的双列直插式测试仪安装到终端装置上所需的插座中。要安装油尺,请将标有银点的油尺末端与带有识别标记的插座末端对齐,然后将油尺推入插座。插入过程中小心不要弯曲任何销。连接器P1信号路径参考附录B中的TB1至TB4示意图,以了解TB1至TB 4的详细图纸和定义引脚连接P1至P3的表格。终端装置安装安装保险丝、跳线设置和跳线正确配置后,终端装置即可安装。终端单元安装在标准NFTP01面板上 。安装将NTDI02终端单元安装到现场终端面板:1.将电路板的凸耳插入终端面板支架的适当插槽中, 并将电路板滑入适当位置。2.使用两个10 x 5/8号螺纹成型螺钉将终端装置电路板固定到现场终端面板。 TB4终端装置安装WBPEEUI260050A0 2-5电缆连接将终端装置安装到现场终端面板后,安装NKTU01或NKTU11终端电缆。 显示了I/O模块和终端单元的电缆连接图。 端接单元安装,位于IO盘中,位于IO单元螺钉 。电缆连接T04833A输入/输出模块NKTU01 NKTU11 16输入/输出点 接单元的安装安装端接单元电缆:1。将NKTU01或NKTU11终端单元电缆的J2连接器安装到分配给I/O模块的模块安装单元背板插槽中。2.将电缆的J1接头插入终端装置的P1。
By cutting the tape in a specific order
No cutting belt is equipped with depth sounder. Cut the feeler tape with a standard diffluent cutting tool. Always cut the belt completely (e.g. the gap should be at least 0.5 mm). Install the configured dual in-line tester into the required socket on the terminal unit. To install the dipstick, align the end of the dipstick with the silver dot and the end of the socket with the identification mark, and then push the dipstick into the socket. Be careful not to bend any pins during insertion. For the signal path of connector P1, refer to the schematic diagram of TB1 to TB4 in Appendix B for the detailed drawings of TB1 to TB4 and the tables defining the pin connections P1 to P3. The terminal device can be installed after the fuse, jumper setting and jumper are correctly configured. The terminal unit is installed on the standard NFTP01 panel. Installation Install the NTDI02 terminal unit to the field terminal panel: 1. Insert the lug of the circuit board into the appropriate slot of the terminal panel bracket and slide the circuit board into the appropriate position. 2. Secure the terminal unit circuit board to the field terminal panel using two 10 x 5/8 # thread forming screws. TB4 terminal unit installation WBPEEUI260050A0 2-5 cable connection After installing the terminal unit to the field terminal panel, install the NKTU01 or NKTU11 terminal cable. Shows the cable connection diagram of the I/O module and the terminal unit. The termination unit is installed in the IO disk and located in the IO unit screw. Cable connection Installation of T04833A I/O module NKTU01 NKTU11 16 I/O point connection unit Cable: 1. Install the J2 connector of the NKTU01 or NKTU11 terminal unit cable into the module installation unit backplane slot assigned to the I/O module. 2. Insert the J1 connector of the cable into P1 of the terminal unit.
电源接线
有三个端子提供电源和接地连接。端子位置 。系统电源通过Faston连接器E1和E2连接至终端装置,并可通过保险丝(F1和F2)和跳线(J1-J16)分配至配置插座(XU1-XU16)。根据应用,可以将任何电源组合连接到这些连接器。然而,这需要仔细的系统分析,以确保电路板迹线电流容量不会超过。单个迹线可以处理连续的三安培。系统接地或中性线通过Faston连接器E3连接。注意:在安装或卸下分配给该插槽的电缆之前,从其分配的插槽中卸下模块。否则可能导致模块损坏。注意:如果16个现场电源输入中的任何一个超过120Vac,请勿向E1或E2施加输入电压。如果交流电压异相,总电压水平将超过NTDI02额定电压,这可能会损坏终端装置。警告:在开始安装、改造、升级或接线程序之前,验证主电源、现场电源和电源输入面板断路器/开关是否已关闭。否则可能导致严重或致命的休克。在安装、改装、升级或接线程序完成之前,请勿打开电源。
Power wiring
Three terminals provide power and ground connections. Terminal location. The system power is connected to the terminal unit through Faston connectors E1 and E2, and can be distributed to the configuration socket (XU1-XU16) through fuses (F1 and F2) and jumpers (J1-J16). Depending on the application, any combination of power supplies can be connected to these connectors. However, this requires careful system analysis to ensure that the circuit board trace current capacity does not exceed. A single trace can handle three consecutive amps. The system ground or neutral wire is connected through Faston connector E3. Note Remove the module from its assigned slot before installing or removing the cable assigned to that slot. Otherwise, the module may be damaged. Note: If any of the 16 field power inputs exceeds 120Vac, do not apply input voltage to E1 or E2. If the AC voltage is out of phase, the total voltage level will exceed the NTDI02 rated voltage, which may damage the terminal device. WARNING: Verify that the main power, field power, and power input panel breakers/switches are turned off before beginning installation, modification, upgrade, or wiring procedures. Failure to do so may result in severe or fatal shock. Do not turn on the power until the installation, modification, upgrade, or wiring procedures are complete.
")
")

